Part 1, Build your custom Vpc
Use Create VPC to start building your own custom vpc
- Call your vpc anything you want, i.e.VPCTrain01
- Cider block, user
10.0.0.0/16which gives you the biggest address range possible. - Use default Tenancy (which means is a multi tenant env)
-
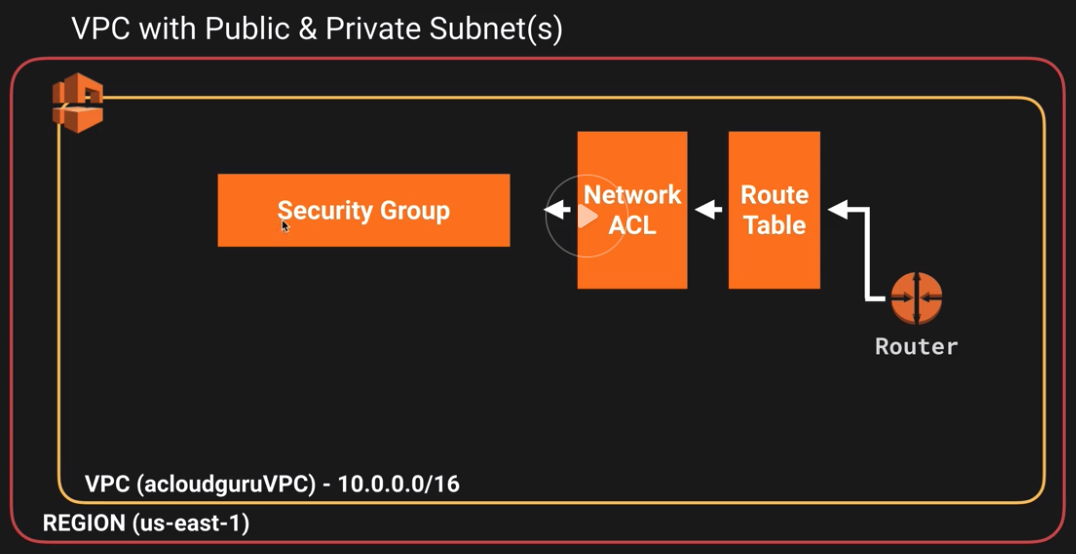
Once you create your vpc a few things gets created for us including:
- Route table
- New default Network ACL
- New Security Group
- No IGW
- No Subnets (you have to create that yourself)
So this is what we have so far
 The next step is to create our subnets
 - Create a subnet with 10.0.1.0/24 (giving you 256 IP addresses, but you do lose 5 IPs which are resevred by Amazon
- Create another subnet (10.0.2.0) in another AZ. (ip cidr block 10.0.2.0/24)
- Here is what we have now

- IGW: Create an Internet Gateway and attach it to the VPC you created earlier
- Create a route table (since we don’t want to change the main route table)
- Edit route and add 0.0.0.0/0, connecting it to igw
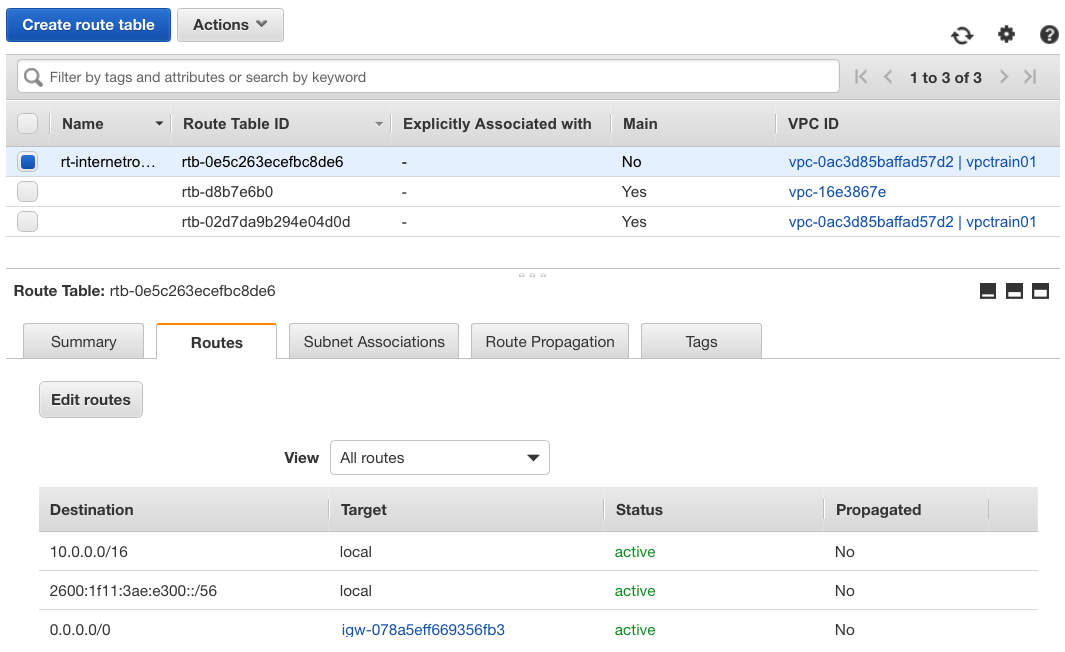
if you want to add IPV6, add ::/0 as well. - Next associate one of your subnet (Canada 1a) to the IGW and test the connectivity.
10.0.1.0 - ca-central-1a - By default public ips are are not assigned
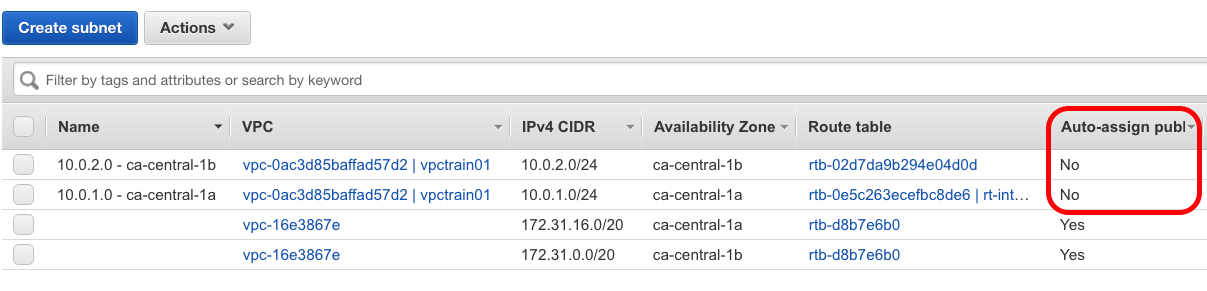
- Enable auto ip assign under subnets/Actions/enable auto assign IP
- Start a new EC2 instance and use the public subnet assigned
- Enable both ssh and http
- Create another Ec2 instance and assign it to the private subnet and leave it to the default security group. Note: this newly created instance does not have a public IP.
- Here is what the final VPC looks like
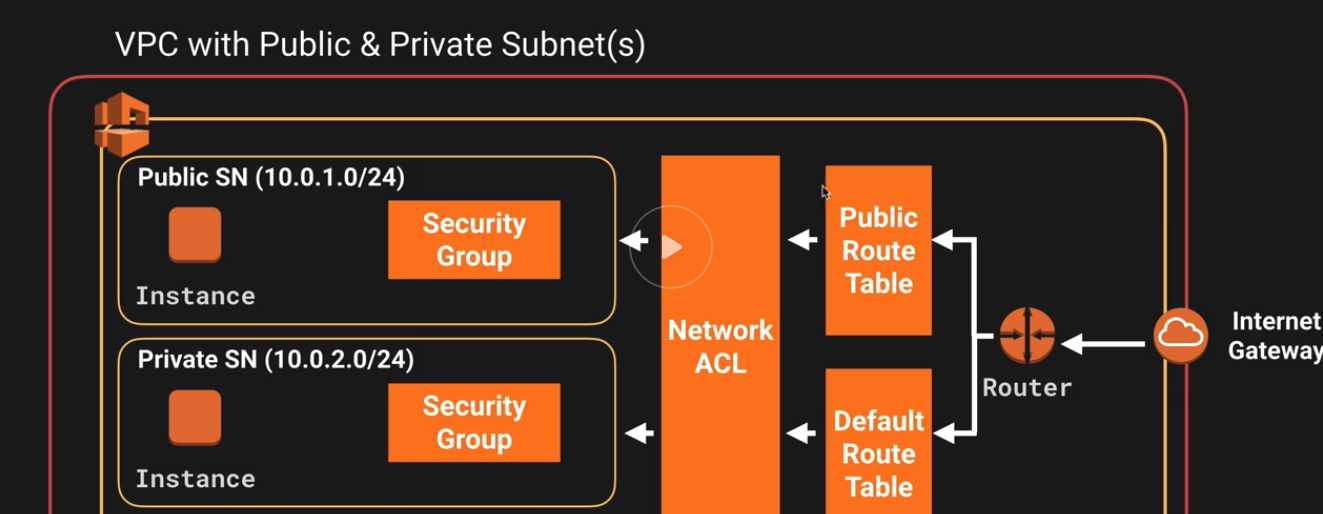 These EC2 won’t be able to talk to each other since they are defined into separete secrutiy groups and we have not allowed communication between them.
In the next part we will set them up to talk to each other.
These EC2 won’t be able to talk to each other since they are defined into separete secrutiy groups and we have not allowed communication between them.
In the next part we will set them up to talk to each other. - Try ssh into the publicly enabled EC2 instance to make sure it is reachable.
sudo suyum update -y